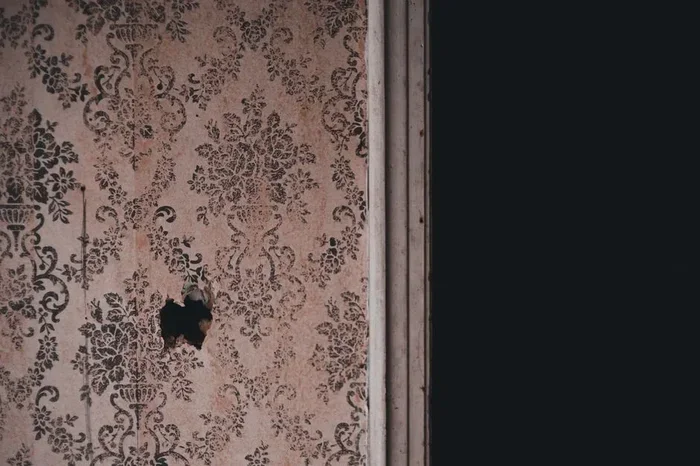
Living Room Wall Stencils That Transform Your Space
Living room wall stencils are one of the easiest and most affordable ways to transform your space without committing to permanent changes. Whether you want a bold accent wall or subtle decorative touches, stencils give you endless creative freedom. This guide covers everything from choosing the right stencil kit to applying techniques that look professional. You will learn practical tips, popular design ideas, and common mistakes to avoid. By the end, you will feel confident enough to start your own DIY wall art project today.
Living room wall stencils have become one of the hottest trends in home décor. They offer a simple way to add color, pattern, and personality to any wall without the cost of custom artwork. If you have been searching for a fresh way to update your space, stencils might be the perfect solution.
Many people assume that wall stencils require artistic skill. In reality, anyone can create beautiful results with a little patience and the right technique. The key is choosing the right design, using quality materials, and following a few straightforward steps. This guide walks you through everything you need to know.
## Why Living Room Wall Stencils Are So Popular
Wall stencils have been around for centuries, but their popularity has surged in recent years. Homeowners and renters alike love them because they offer creative freedom without permanent commitment. You can change your wall design every season if you want to keep things fresh.
The main appeal lies in their versatility. A single stencil kit can produce dozens of different looks depending on how you use it. You can create subtle patterns or bold statement walls. The choice is entirely yours.
### Budget-Friendly Home Décor
One of the biggest advantages of using living room wall stencils is cost. A quality stencil kit typically costs between 20 and 60 dollars. Compare that to hiring a mural artist, which can run into hundreds or even thousands of dollars.
You also save money on tools. Most projects only require basic supplies like paint, tape, and a sponge roller. You do not need specialized equipment or professional experience. This makes stencils one of the most accessible forms of DIY wall art available.
### Perfect for Any Skill Level
Whether you are a complete beginner or a seasoned DIY enthusiast, stencils work for you. Simple designs with large shapes are great for first-timers. More intricate patterns challenge experienced users who want to refine their technique.
The learning curve is gentle. Most people complete their first project in just a few hours. You build confidence quickly, and each project gets easier than the last.
## Choosing the Right Stencil Design for Your Living Room
Picking the right design is the most important step. The wrong pattern can clash with your furniture and color scheme. The right one ties the entire room together beautifully.
### Popular Stencil Patterns
There are countless stencil patterns to choose from. Here are some of the most popular options for living rooms:
- Geometric patterns: Triangles, hexagons, and chevron designs create a modern, clean look.
- Floral motifs: Flowers and leaves add warmth and a natural feel to any space.
- Damask and ornate: Elegant swirls and scrolls work well in traditional or vintage-inspired rooms.
- Stripes and lines: Simple horizontal or vertical lines give a subtle, sophisticated touch.
- Tropical prints: Palm leaves and exotic flowers bring a vacation vibe indoors.
- Abstract shapes: Free-form designs add artistic energy without a specific theme.
### Matching Stencils to Your Room Style
Your stencil choice should complement your existing décor. For a minimalist room, stick with simple geometric patterns. For a cozy, eclectic space, consider floral or damask designs. If you follow aesthetic living room ideas, stencils can become the focal point that ties everything together.
Think about your color palette too. You can use the same wall color as your base and stencil in a contrasting shade. Or go bold with a dark wall and light stencil pattern. The contrast creates depth and visual interest.
## Tools and Materials You Will Need
Having the right tools makes a huge difference in the final result. You do not need much, but each item plays an important role.
### Essential Supplies
Here is a simple list of everything you need to get started:
- Stencil sheets: Choose durable mylar or plastic stencils that are reusable.
- Stencil paint: Use acrylic or chalk paint for the best coverage and easy cleanup.
- Stencil brushes or rollers: A small foam roller works great for large areas. A stencil brush gives you more control for details.
- Painter’s tape: This keeps the stencil firmly in place while you work.
- Level: A small bubble level ensures your pattern stays straight.
- Pencil and ruler: For marking reference points on the wall.
- Drop cloth: Protect your floor from paint drips and spills.
### Pro Tip for Better Results
Use a stencil adhesive spray to keep the stencil flat against the wall. This prevents paint from bleeding underneath the edges. It makes a noticeable difference, especially with detailed patterns.
## Step-by-Step Guide to Applying Living Room Wall Stencils
Now that you have your supplies, it is time to start painting. Follow these steps for a clean, professional-looking finish.
### Step 1: Prepare Your Wall
Start by cleaning the wall surface. Remove any dust, dirt, or grease with a damp cloth. Let it dry completely before you begin. If the wall has existing paint, make sure it is smooth and free of peeling.
### Step 2: Plan Your Layout
Before you touch any paint, plan where each stencil will go. Use a pencil and level to mark the starting point. For repeating patterns, measure the spacing carefully so the design lines up evenly across the wall.
### Step 3: Secure the Stencil
Place the stencil on the wall and tape it down firmly. Make sure there are no gaps between the stencil and the wall. Paint can seep under loose edges and create blurry lines.
### Step 4: Apply the Paint
Dip your brush or roller lightly into the paint. You want a small amount on the tool, not a heavy coat. Too much paint causes bleeding and drips. Use a dabbing or rolling motion rather than sweeping strokes.
### Step 5: Remove and Repeat
Carefully lift the stencil and check your work. Let the paint dry for a few minutes before repositioning the stencil for the next section. Continue this process until the entire wall is complete.
### Step 6: Clean Up and Seal
Once the paint is fully dry, gently remove the tape. If you want extra durability, apply a clear matte sealant over the finished design. This protects the stencil work from dust and minor scuffs.
## Common Mistakes to Avoid with Wall Stencils
Even with the best intentions, mistakes can happen. Here are the most common errors and how to avoid them.
### Using Too Much Paint
This is the number one mistake beginners make. Heavy paint application causes bleeding under the stencil edges. Always load your brush or roller lightly and build up coverage in thin layers.
### Skipping the Planning Phase
Jumping straight into painting without a plan leads to crooked lines and uneven spacing. Take the time to measure and mark your wall first. The extra effort saves frustration later.
### Choosing the Wrong Stencil Size
Large stencils on small walls can feel overwhelming. Tiny stencils on large walls may look sparse. Match the stencil size to your wall dimensions for the best visual balance.
### Ignoring Drying Times
Reapplying a stencil before the paint dries smears the design. Be patient and let each section dry completely before moving on.
## Creative Ways to Use Stencils Beyond the Wall
Stencils are not limited to walls. Once you get comfortable with the technique, you can apply them to many surfaces in your living room.
### Accent Furniture Pieces
Stencil a pattern onto a plain side table or bookshelf. This adds a custom touch that makes your furniture stand out. If you have simple shelving from IKEA living room shelves, a stencil design can instantly elevate their look.
### Decorative Pillows and Throw Blankets
Fabric stencils let you create custom throw pillows and blankets. Choose a pattern that complements your wall design for a coordinated look.
### Ceilings and Trim
Do not forget about the ceiling and baseboards. A subtle stencil pattern on the ceiling adds an unexpected surprise. Stenciling trim in a contrasting color gives the room a polished, finished feel.
## Pairing Stencils with Your Existing Décor
Your stencil design should work harmoniously with the rest of your living room. Consider how it interacts with your furniture, lighting, and accessories.
### Complementing Accent Pieces
Stencils pair beautifully with carefully chosen accent pieces. For example, a geometric wall stencil looks stunning next to a bold accent piece for living room like a sculptural vase or a statement mirror. The combination creates visual depth without feeling cluttered.
### Working with Shelving and Storage
If you have open shelving, stencils can extend the design theme. Stencil the back panel of a shelf or the wall behind it. This creates a cohesive look that draws the eye. For storage solutions, check out how to decorate shelves in living room for more inspiration on integrating stencils with your shelving setup.
### Creating a Cohesive Aesthetic
For a truly polished look, make sure your stencil colors match or complement your room’s color palette. Use no more than two or three colors in your stencil design. This keeps things elegant and avoids visual chaos.
## Expert Tips for Stunning Living Room Wall Stencils
Professional designers share a few secrets that make stencil projects look effortlessly polished.
Use a lightbox or bright light behind the stencil. This helps you see the design edges clearly, especially for intricate patterns.
Rotate the stencil as you work. This prevents paint from building up in one spot and bleeding under the edges.
Test your design on a scrap board first. This lets you practice the technique and adjust paint consistency before touching the actual wall.
Layer colors for dimension. Instead of using one flat color, try layering two shades. A lighter base with a darker overlay adds depth and richness to the design.
Step back frequently. Stand a few feet away every few minutes to check the overall look. This helps you catch any misalignment early.
These small tips make a big difference in the final result.
## Where to Find Quality Stencil Kits
You can find stencil kits at most craft stores and home improvement centers. Online retailers offer an even wider selection. Look for kits made from durable mylar material, as these last longer and produce cleaner lines.
Some popular brands include Crafter’s Choice, Royal Design Studio, and Stencil Revolution. Read reviews before purchasing to ensure you get good quality. A well-made stencil saves you time and frustration.
## Conclusion
Living room wall stencils are a powerful yet simple way to transform your space. They are affordable, customizable, and suitable for every skill level. Whether you choose a bold geometric pattern or a delicate floral design, stencils add character and charm to any room.
The best part is that there is no wrong way to do it. Experiment with different designs, colors, and surfaces until you find what feels right for your home. Start with a small project if you are new to stenciling, and build your confidence from there.
Grab your supplies, pick a design you love, and enjoy the process of creating something truly unique. Your living room will thank you for it.
Key Takeaways
- Wall stencils are budget-friendly: They cost a fraction of wallpaper or custom murals while delivering stunning results.
- Endless design options: From geometric patterns to floral motifs, there is a stencil style for every living room aesthetic.
- Easy to apply and remove: Most stencils are reusable and work on almost any wall surface with basic tools.
- Perfect for renters: Stencils can be removed or repainted, making them ideal for temporary décor solutions.
- Pair with accent pieces: Combining stencils with accent pieces for living room creates a layered, designer look.
- Start simple: Beginners should practice on a small wall section before tackling a full accent wall.
Frequently Asked Questions
Can I use wall stencils in a rented apartment?
Yes, wall stencils are ideal for renters because they can be painted over or removed easily. The paint sits on top of the wall surface, so it does not cause permanent damage. Simply repaint the wall with a solid color when you move out, and you are good to go.
What type of paint works best for wall stencils?
Acrylic and chalk paints are the best choices for wall stencils. They dry quickly, have good coverage, and clean up easily with water. Avoid using thick oils or latex paints because they tend to bleed under the stencil edges.
How do I keep paint from bleeding under the stencil?
Use a light hand when applying paint and dab rather than swipe. A stencil brush or foam roller works better than a regular paintbrush. You can also apply a thin layer of stencil adhesive to keep the edges sealed against the wall.
Are wall stencils reusable?
Most quality stencils made from mylar or thick plastic are fully reusable. Clean them with soap and water after each use, and store them flat to prevent warping. A single stencil kit can be used for multiple projects across different rooms.
How long does a stencil project take?
A simple stencil project can be completed in one to three hours, depending on the wall size and pattern complexity. Larger or more intricate designs may take longer. Plan for extra time if you are working on multiple walls or layering colors.
Can I create my own custom stencils?
Absolutely. You can design your own stencils using stencil paper or thick plastic sheets and a craft knife. Many online tutorials walk you through the process step by step. Custom stencils let you create truly one-of-a-kind designs for your space.