How to Arrange Wall Art Like a Professional Designer
Arranging wall art doesn’t have to be hard. This guide shows you how to arrange wall art like a professional designer, from choosing the right pieces to perfecting spacing and height. You’ll learn proven wall art arrangement techniques that transform any room instantly.
Key Takeaways
- Art Placement Matters: Hanging artwork at eye level creates a polished, professional look in any space.
- Spacing is Key: Keep 2 to 3 inches between pieces for a clean, balanced gallery wall.
- Match Art to Furniture: Wall art should complement the furniture below it, not float randomly on the wall.
- Mix Sizes and Styles: Combining different frame sizes and art styles adds visual interest and depth.
- Use a Template First: Paper templates save time and prevent unnecessary holes in your walls.
- Consider Room Purpose: The vibe of the room should guide your art selection and arrangement choices.
📑 Table of Contents
- How to Arrange Wall Art Like a Professional Designer
- Step 1: Choose the Right Wall Art for Your Space
- Step 2: Master the Art of Hanging Height
- Step 3: Plan Your Layout Before You Hammer
- Step 4: Create Balance with Symmetry and Asymmetry
- Step 5: Nail the Spacing Between Pieces
- Step 6: Style Walls with Art and Decor Together
- Common Mistakes in Wall Art Arrangement
- Final Thoughts on Arranging Wall Art
How to Arrange Wall Art Like a Professional Designer
Wall art can make or break a room’s look. It sets the mood, adds color, and ties everything together. But how to arrange wall art the right way? That’s where most people struggle. You buy beautiful pieces, hang them up, and somehow the room still feels off. The secret? It’s all about placement, spacing, and balance.
In this guide, we’ll walk you through every step a professional designer follows. You’ll learn wall art arrangement rules that work for any room size, any style, and any budget. Whether you’re hanging a single piece above a sofa or building a full gallery wall, these tips will help you get it right the first time. Let’s dive in.
Why Wall Art Arrangement Makes a Difference
Art isn’t just decoration. It’s a design tool that shapes how a room feels. The right wall art placement draws the eye, creates flow, and makes a space look intentional. Bad placement, on the other hand, can make even the most expensive room feel chaotic.
Think about it this way. A single painting hung too high looks lost. A cluster of mismatched pieces with no plan looks cluttered. But when you follow a few simple rules, the result is stunning. Great wall art styling adds personality and warmth. It turns a plain wall into a focal point that guests notice the moment they walk in.
Art arrangement ideas don’t have to be complicated. You don’t need a degree in interior design. You just need the right approach. And that’s exactly what this article breaks down for you.
Step 1: Choose the Right Wall Art for Your Space
Before you grab a hammer, start with the art itself. Choosing the wrong piece for the wrong spot is the most common mistake. The first step in decorating wall art is understanding what works in your space.
Consider the Room’s Purpose
Every room has a job. The bedroom should feel calm and restful. The living room should feel welcoming and lively. The hallway should feel interesting and dynamic. Your wall art selection should match that energy.
- Living rooms: Go for bold, statement pieces. A large canvas or a curated gallery wall works wonders here.
- Bedrooms: Choose soft, calming art. Think landscapes, abstract pastels, or simple line drawings.
- Hallways: Use a series of smaller prints. They create a natural gallery as people walk by.
- Dining rooms: Opt for art that sparks conversation. Food-themed prints or vibrant abstracts fit well.
Match Art Size to Wall Space
Size matters more than most people realize. A tiny print on a huge wall looks lost. An oversized piece on a small wall feels overwhelming. Here’s a simple rule of thumb. The art should take up about two-thirds to three-quarters of the furniture below it. If you have a six-foot sofa, aim for a piece that’s four to five feet wide.
For those who love the look of mirror wall art for living room setups, the same sizing rule applies. A large mirror can anchor a wall just like a painting. Just make sure it reflects something beautiful, like a window or a light source.
Step 2: Master the Art of Hanging Height
One of the biggest questions people ask is, “How high should I hang wall art?” The answer is simpler than you think. Professional designers follow one golden rule. The center of the artwork should sit at eye level. That’s about 57 to 60 inches from the floor.
Why Eye Level Works
Eye level is where the human gaze naturally falls. When art sits at this height, it feels balanced and intentional. It draws the viewer in without forcing them to tilt their head up or down. This is the foundation of great art placement.
There are exceptions, of course. If the art sits above a piece of furniture, hang it so the bottom of the frame is 6 to 8 inches above the furniture. This creates a visual connection between the art and what’s below it. It makes the whole arrangement feel unified.
Common Height Mistakes to Avoid
- Hanging too high: People tend to nail the hook too high because they think the wall is taller than it is. Step back and check before you commit.
- Hanging too low: Art placed too low gets lost in the furniture. It loses its impact completely.
- Ignoring ceiling height: In rooms with high ceilings, you can go slightly above eye level. But don’t go more than a few inches.
If you’re styling a minimalist wall art for living room setup, the hanging height becomes even more important. Minimalist art relies on clean lines and breathing room. The right height gives the piece the spotlight it deserves.
Step 3: Plan Your Layout Before You Hammer
Never hang art blind. Professional designers always plan first. The best wall art layout starts on the floor or with paper templates on the wall.
The Floor Method
Lay your art out on the floor in the arrangement you want. Step back and look at it from a distance. Does it feel balanced? Are the sizes working together? This method works especially well for gallery walls and grouped arrangements.
Take a photo of the floor layout. Then hold your phone up to the wall and use it as a reference. It’s a simple trick that saves time and keeps you from making mistakes.
The Paper Template Method
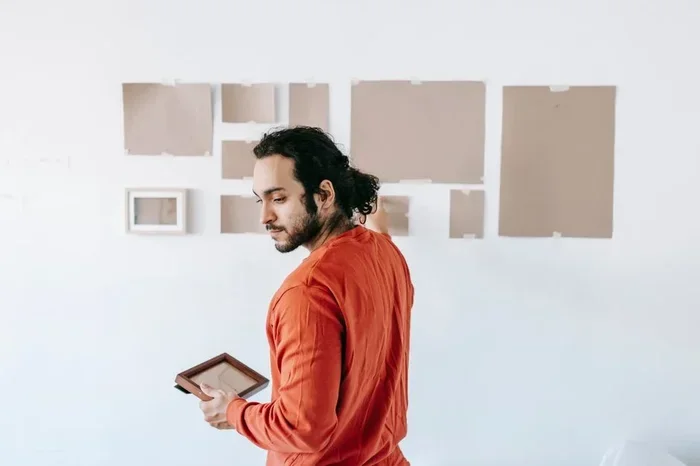
Trace each frame onto newspaper or kraft paper. Cut out the shapes. Tape them to the wall with painter’s tape. Step back and adjust until everything looks right. Then you know exactly where each nail goes.
This method is a game changer. It takes five extra minutes but saves you from a wall full of mismatched holes. Trust us, this is how the pros do it.
Use a Level Tool
Even the slightest tilt throws off an entire arrangement. A small bubble level or a phone app keeps everything straight. No one wants crooked art on their walls. It’s an easy fix that makes a huge difference.
Step 4: Create Balance with Symmetry and Asymmetry
Balance is the secret sauce of professional wall art arrangement. There are two main approaches: symmetric and asymmetric. Both work beautifully when done right.
Symmetric Arrangements
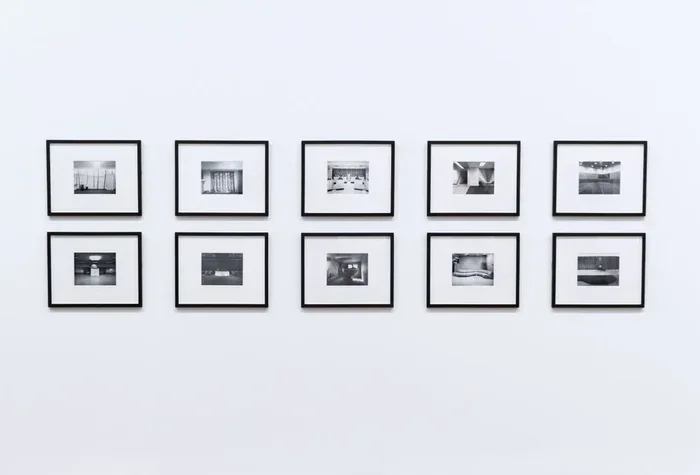
Symmetry means mirroring elements on either side of a center point. Two identical frames flanking a fireplace. A row of same-sized prints above a console table. Symmetry feels formal, calm, and orderly. It works great in traditional spaces and hallways.
If you love the clean look of symmetric art arrangement ideas, try this. Hang a large central piece first. Then add matching pieces on each side. Keep equal spacing between every frame. The result is elegant and timeless.
Asymmetric Arrangements
Asymmetry is more modern and playful. It uses different sizes, shapes, and styles to create visual interest. But it still follows the rule of balance. The visual weight on each side should feel roughly equal, even if the pieces aren’t identical.
For example, a large painting on one side can be balanced by a group of three smaller pieces on the other. Or a tall frame paired with a wide one. The key is to distribute the weight so the arrangement doesn’t feel lopsided.
If you’re going for a more curated look, consider how luxury wall art for living room designs mix different textures and frame styles. Layering pieces with varied proportions creates that high-end, designer feel.
Step 5: Nail the Spacing Between Pieces
Spacing is where most DIY arrangements go wrong. Too close, and the wall looks cramped. Too far apart, and the pieces feel disconnected. The sweet spot is usually 2 to 3 inches between frames for a tight gallery wall, and 3 to 6 inches for a more relaxed feel.
Spacing Rules for Different Setups
- Gallery walls: Keep 2 to 3 inches between frames. This creates a cohesive, curated look.
- Symmetric rows: Use equal spacing throughout. Consistency is the goal here.
- Floating art: Leave more space around each piece. Let the art breathe for a modern feel.
- Above furniture: Keep 6 to 8 inches between the furniture top and the art bottom.
Consistency is everything. If you’re mixing frame sizes, keep the spacing between them uniform. This single detail makes even a random-looking arrangement look intentional and polished.
Step 6: Style Walls with Art and Decor Together
Wall art doesn’t exist in a vacuum. It works best when it interacts with the rest of the room. Think about the furniture, lighting, and colors around it. Great decorative wall arrangements feel like they belong in the space.
Pair Art with Furniture
A large piece of art above a sofa anchors the seating area. A pair of smaller frames above a sideboard creates a balanced look. The art should relate to what’s below it. If your sofa is modern and sleek, choose art with clean lines too.
For metal wall art for living room setups, the contrast between metal frames and other materials adds texture. Mix metal with wood frames or fabric elements to keep the room feeling layered and interesting.
Consider Lighting
Lighting can make or break your wall art. A picture light above a piece draws the eye and adds drama. Track lighting works well for gallery walls. Even a well-placed floor lamp can highlight a favorite print. Don’t underestimate how much light changes the way art looks on a wall.
Add Depth with Shelves and Objects
Sometimes the best wall art design isn’t just art on a flat wall. Adding open shelves, plants, or small objects around your framed pieces creates dimension. It gives the arrangement a lived-in feel that pure art alone can’t achieve.
Common Mistakes in Wall Art Arrangement
Even with the best intentions, mistakes happen. Here are the most common ones to watch out for.
- Choosing art that’s too small: This is the number one mistake. When in doubt, go bigger.
- Ignoring the room’s color palette: Art should complement the room’s colors, not clash with them.
- Hanging all art at the same height: This works for rows, but for gallery walls, the center of each piece should be at eye level, not the top.
- Skipping the planning step: Never go straight to the wall without a plan. Always mock up the layout first.
- Using too many frames: More isn’t always better. Leave some breathing room on the wall.
Final Thoughts on Arranging Wall Art
Arranging wall art like a professional designer is easier than you think. It all comes down to a few simple principles. Choose art that fits the room. Hang it at the right height. Plan your layout before you start. Balance your pieces with symmetry or asymmetry. Get the spacing right. And style the art alongside your furniture and decor.
The best wall art arrangement feels effortless. It looks like someone put real thought into it, but it doesn’t feel forced. That’s the goal. Start with one wall. Practice the techniques. Then expand to other rooms as your confidence grows.
Remember, there are no strict rules in design. These guidelines give you a strong foundation. But your home should reflect your personality. So have fun with it. Experiment with different layouts. Swap pieces around. The beauty of wall art is that it’s completely changeable. You can always rearrange until it feels just right.
Now you have everything you need to hang your walls with confidence. Grab your art, grab your tools, and start creating a space that truly feels like yours. Happy decorating!
Frequently Asked Questions
What is the best height to hang wall art?
The center of the artwork should be at eye level, which is about 57 to 60 inches from the floor. If the art sits above furniture, keep the bottom of the frame 6 to 8 inches above the furniture top. This creates a natural visual connection between the art and the piece below it.
How do I arrange a gallery wall?
Start by planning the layout on the floor or with paper templates on the wall. Mix different sizes and frame styles for visual interest, but keep the spacing consistent at 2 to 3 inches between pieces. Always aim for balance, even if the arrangement is asymmetric. Step back frequently to check the overall look.
How much wall space should art cover?
As a general rule, wall art should cover about two-thirds to three-quarters of the furniture below it. For example, a six-foot sofa should have a piece of art that’s four to five feet wide. Going too small makes the art look lost, while going too large can overwhelm the space.
Can I mix different art styles in one room?
Yes, mixing styles adds personality and depth. The key is to find a unifying element, such as a consistent color palette, matching frames, or similar subject matter. This keeps the arrangement feeling cohesive rather than random. Professional designers often mix styles intentionally for a curated look.
Should wall art be centered on the wall or on the furniture?
Art should be centered on the furniture below it, not the wall itself. This creates a balanced, intentional look. If there’s no furniture, then centering on the wall works fine. The goal is to create a visual anchor that ties the room together.
What are the easiest wall art arrangement mistakes to avoid?
The most common mistakes are hanging art too high, choosing pieces that are too small, and skipping the planning step. Other errors include ignoring the room’s color palette and using inconsistent spacing. Taking the time to plan and measure before hanging saves a lot of frustration and wall damage.
=== CONCLUSION ===
How to arrange wall art doesn’t have to be intimidating. With the right wall art arrangement techniques, anyone can transform their walls into stunning displays. From choosing the perfect pieces to nailing the height, spacing, and balance, every step matters. The tips in this guide give you the tools to hang art with confidence and style.
Start small if you need to. One well-placed piece can change a whole room. Then build from there as you get more comfortable. The most important thing is to enjoy the process and let your personality shine through your choices. Your walls are a canvas. Make them count.